[Chapter 2:Chapter 3:Chapter 4:Chapter 5:Chapter 6][Top]
|
|
E-CELL2 User's Manual
|
Chapter 1: Setup Instructions [Chapter 2:Chapter 3:Chapter 4:Chapter 5:Chapter 6][Top] |
|
1 Introduction 2 Quick Install (CD-ROM version) 3 Custom Install (CD-ROM version) 4 Quick Install (Network version) 5 Custom Install (Network version) |
E-CELL1 is a cell simulation software designed for Linux developed at the Tomita Laboratory of Keio University. E-CELL2 was designed to emulate every aspect of E-CELL1 in multiple platforms (MS-Windows, Solaris, Linux). This is an opensource project; as of now, MS-Windows (2000/NT/98/XP) version is under development.
Performing Quick Install installs the above mentioned third-party software with the E-CELL2.26 software and tools. This method is only available for CD-ROM versions.
Let us now start with the installation procedures.
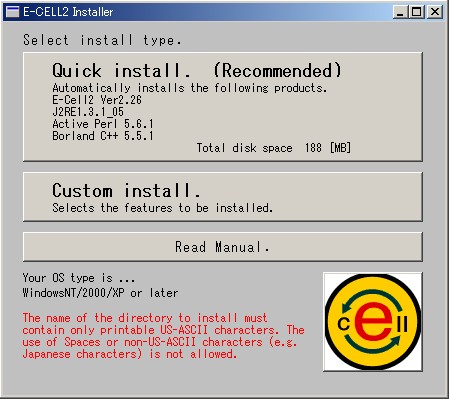
Select "Quick install. (Recommended)".
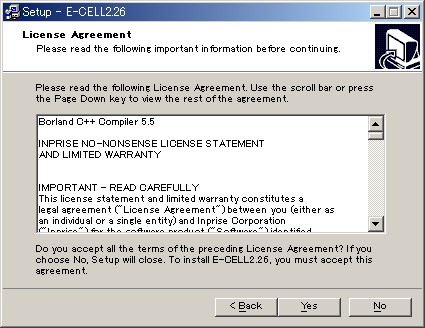
License Agreement for the third party software will be displayed. If you agree with the license, please click "Yes" and select the installation directory to go on with the install.

Set the path information in the HKEY_CURRENT_USER registry for Borland C++ Compiler. If the information is correct, click "OK" to proceed.
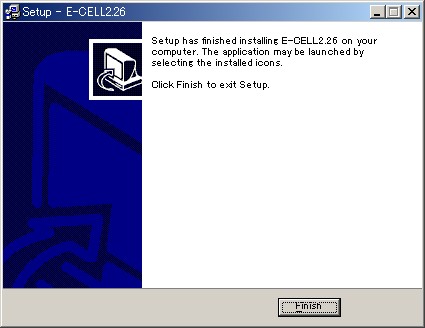
Click "Finish".
Please restart Windows to reflect the settings.
This is the end of the installation procedure. For basic operations, please refer to Chapter 2.
Custom Install is for users who already have the above third-party software already installed, or those who do not wish to install them. The E-CELL2.26 package to be installed will have the same function as that installed by quick install.
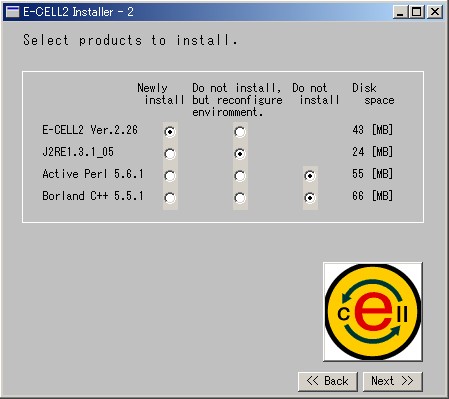
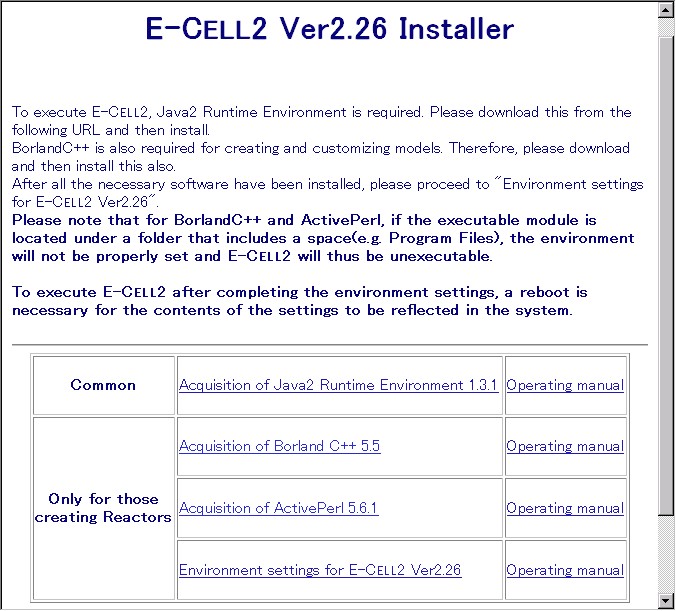
Select "Custom Install" for custom install. Then select the E-CELL2.26 package and third-party software to install from below.
Select from below:
Figure 7: E-CELL2.26 Installer
- Newly install
- Do not install, but reconfigure environment.
- Do not install
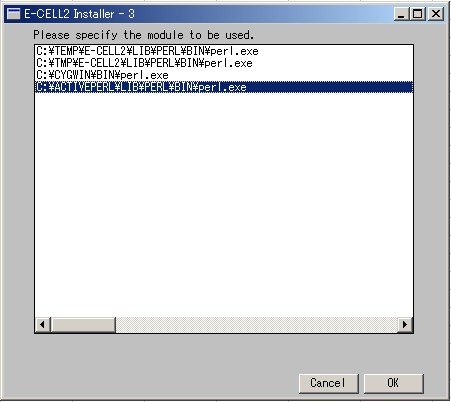
Click "Next" after selection. If "Do not install, but reconfigure environment." is selected, and if the software that will be used by E-CELL2 have already been installed, the candidates will be displayed. Please select the one to use and then click "OK".
The following confirmation screen will be displayed after the software selection process has been completed.
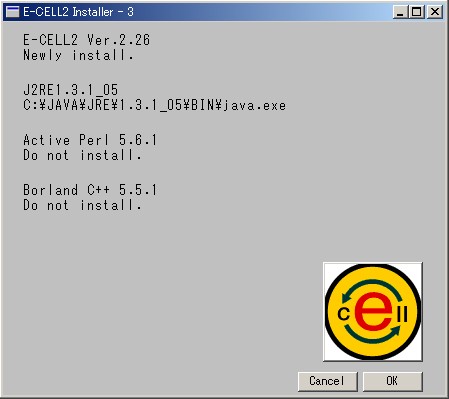
After confirmation, click "OK" to proceed. Any new software will be installed at this point.
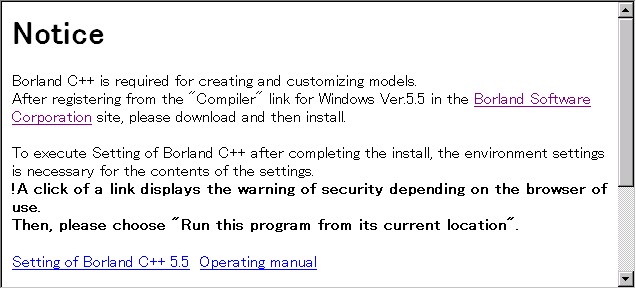
License Agreement for the third party software will be displayed for each software to newly install. If you agree with the license, please click "Yes" and select the installation directory to execute installation.While installing BCC, the following screen will be displayed. For Windows NT/2000, perform path settings in HKEY_CURRENT_USER; for Windows 98, perform path settings in Autoexec.bat. Also create bcc32.cfg and ilink32.cfg for BCC(editable). Click "Next" to proceed.
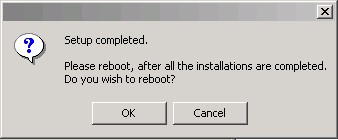
Click "OK" and reboot Windows to reflect the above settings. This is the end of the installation procedure. For basic operations, please refer to Chapter 2.
This is the end of the installation procedure. For basic operations, please refer to Chapter 2.
This is the end of the installation procedure. For basic operations, please refer to Chapter 2.
|
|
E-CELL2 User's Manual
Last Update $Date: 2003/3/25 $. Copyright: Keio University and Mitsui Knowledge Industry Co., Ltd. 2000-2003 |
Chapter 1 : Setup Instructions [Chapter 2:Chapter 3:Chapter 4:Chapter 5:Chapter 6][Top] |